


How to make a spring wreath to brighten up your front door
Dress your door with fabulous florals by following Hobbycraft’s guide to creating a DIY wreath
Image: Hobbycraft
Easter is just around the corner, and that means spending lots of quality time with family and friends. With more footsteps crossing your front door, ensure all of your guests are greeted with a warm welcome by creating your very own homemade floral wreath.
Simply follow Jo Boland’s guide for Hobbycraft to make a gorgeous floral design DIY wreath – it’s perfect for brightening up your door this spring and can be completed in the 10 easy steps below.
Top Tip! Use lots of hot glue when securing any flowers or buds which are not positioned flat on the hoop. Hold the flower in place until the glue cools and hardens.
Equipment you will need
- Sizzix Bigz Die with textured Impressions Bossing Folder
- Sizzix Thinlets Leaf Dies – Meadow Leaves
- Sizzix Big Shot Die Cutting Machine
- Hobbycraft Wooden Embroidery Hoop 9″
- Pamermania Capsule Solid Cardstock 6×6
Craft essentials
- Hot Melt Mini Glue Gun
- Hot Melt Mini Gun Sticks
- Papercraft Tweezers
Steps one – three
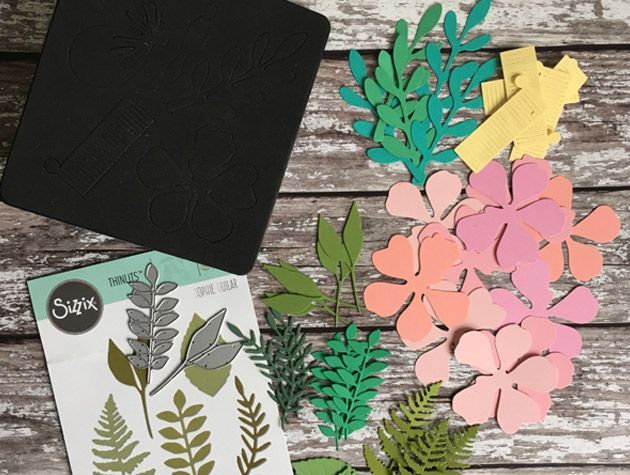
Image: Hobbycraft
- Choose coloured cardstock for your flowers and leaves.
- Die cut flowers and large leaves with the Sizzix Bigz Die. You’ll need four die-cut flowers in four slightly different shades (16 in total), ten stamens in yellow and about ten leaves in two shade of green.
- Die cut additional smaller leaves using the Sizzix Thinlets Leaf Dies – Meadow Leaves in a variety of greens.
Step four
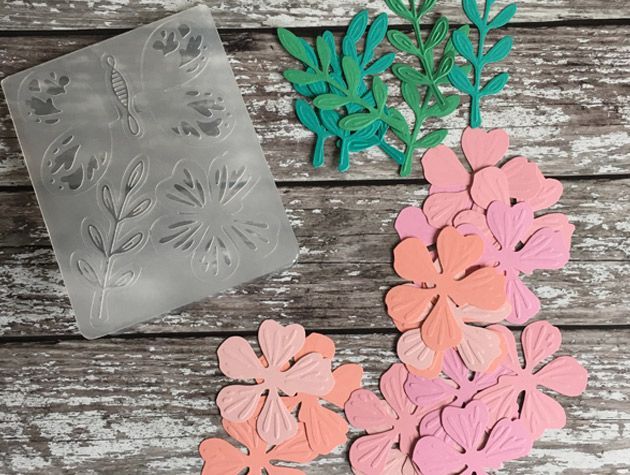
Image: Hobbycraft
- Emboss the flowers and the larger leaves with the embossing folder that comes with the Bigz Die set. To do this you simply place your die cut flowers and leaves in position inside the embossing folder and run it through the die cutting machine. A light pressure on the plates is all you need to create a nice impression.
Step five
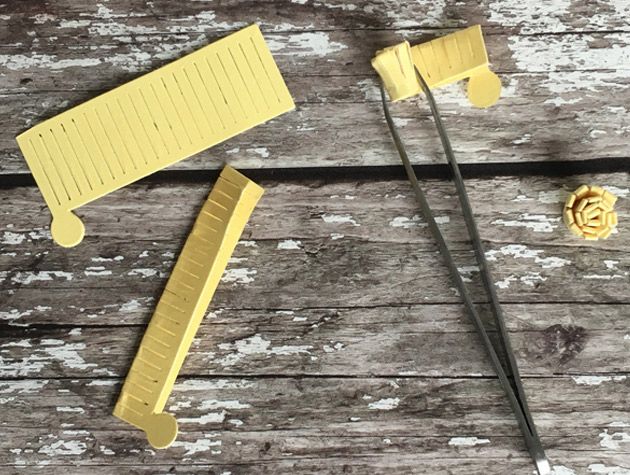
Image: Hobbycraft
- Fold the flowers stamens in half and roll from one end towards the other end with the circle on attached. Use a hot glue gun to glue the circle flat other the rolled up bottom to securely hold it in place. Tweezers are helpful to achieving a tight roll. Spread out the stamens with the tweezers or your fingers.
Step six
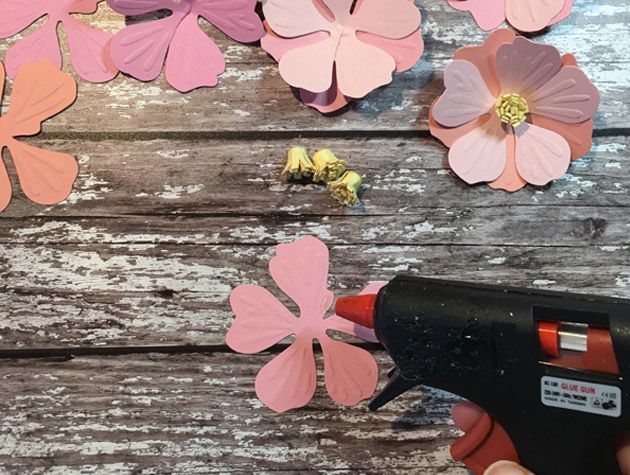
Image: Hobbycraft
- Make flowers 3D by gluing the tab on the side of one of the petals to the adjacent petal. Make 12 single flowers this way. Now layer one flower on top of another to make each open flowers double layered. Glue a stamen into the centre of each of the six double flowers.
Step seven
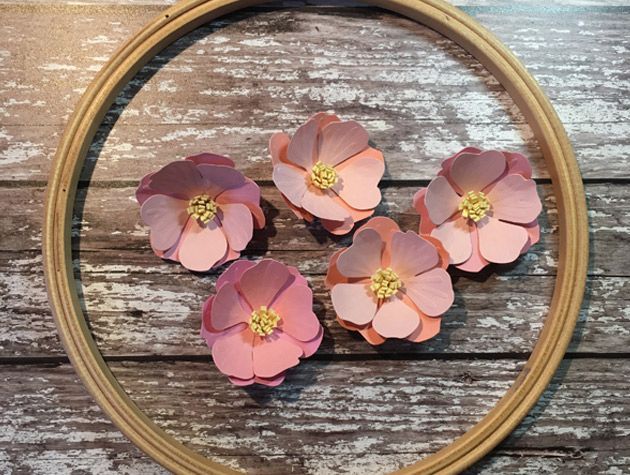
Image: Hobbycraft
- Curl the petals inwards with your fingers to make them look more realistic.
Steps eight and nine
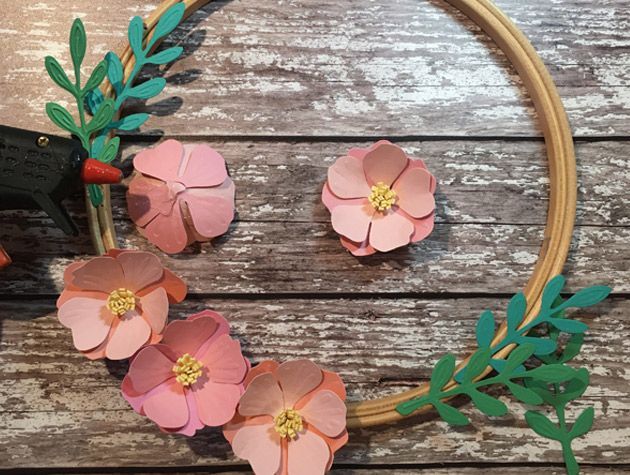
Image: HobbyCraft
- Make four flower buds with the remaining four flat (unglued) die-cut flowers. Do this by gluing a stamen into the centre, fold each petal up in turn and glue it into position before folding up the next adjacent petal. Repeat for each petal and each flower.
- Decide on the position of your main flowers and large leaves; glue them into position with a hot glue gun.
Step ten
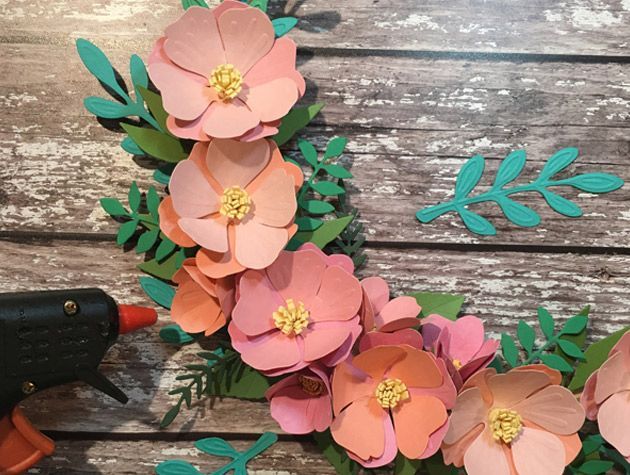
Image: Hobbycraft
- Add the buds (use plenty of hot glue to securely hold them in position) and infill gaps with the additional die cut leaves, use as many or as few as you like.
Step eleven – the finished wreath
Image: Hobbycraft
- Place your beautifully designed wreath on your front door, step back, and tada – let your guests admire your work of art.
Have you created your own wreath for spring? Tweet us your tips @goodhomesmag or post a comment on our Facebook page.