


How to make a DIY drinks bar from pallets
Transform your garden into your perfect lockdown hangout with this clever DIY bar made from pallets.
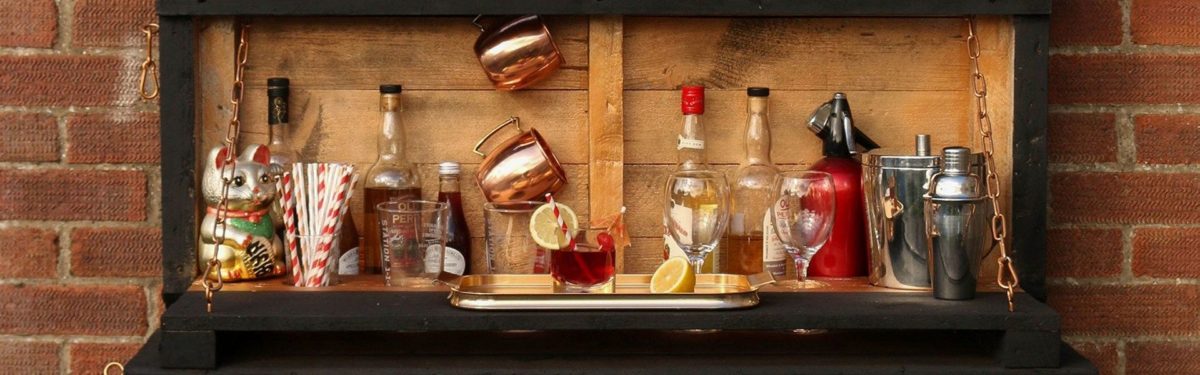
Image: ManoMano
Whether you’re choosing to host guests socially distanced in the garden, or are sticking with your immediate family, creating an outdoor space that makes for easy entertaining may be high on your agenda during lockdown to make the most of the warm weather.
This DIY project, created by online DIY superstore ManoMano, is perfect for transforming your garden into a socialising space – you’ll hardly miss your favourite pub or cocktail bar once your garden bar is up and running!
Materials
- Hand saw
- Wrecking bar
- Hammer
- Palm sander
- Drill with drill bits
- Holesaw kit
- Stapler
3 x Identical pallets - Assorted sandpaper to fit your palm sander in course, medium and fine grits
- 1.5m length of 4mm x 32mm steel chain
Method
1. Use a wrecking bar to carefully remove the planks of wood from all 3 pallets. Attach 3 of the side supports together to create an L shape and screw together. Repeat with another 3 side supports. These will form the upright corners at the back of the bar.
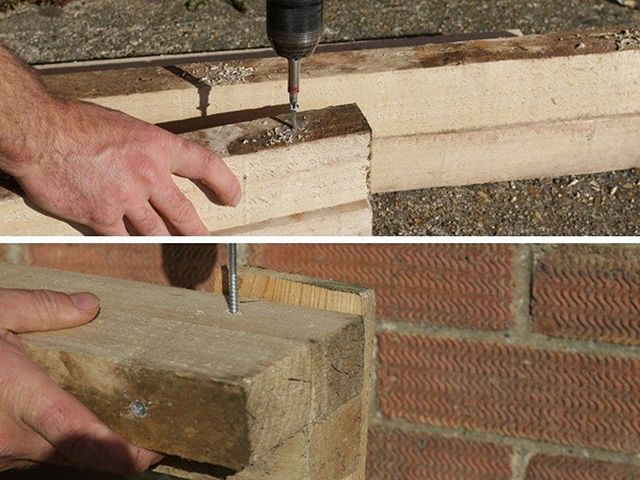
Image: ManoMano
2. Assemble the back of the bar with the new L-shape supports on the corners. You only need to cover the bottom half of the bar (which will be visible from the inside) so position 5 planks closer together to remove gaps and screw them into the corner supports. Add one plank across the top for structural integrity and add a central support. Leaving the gap on the back gives you access to add the lights later.
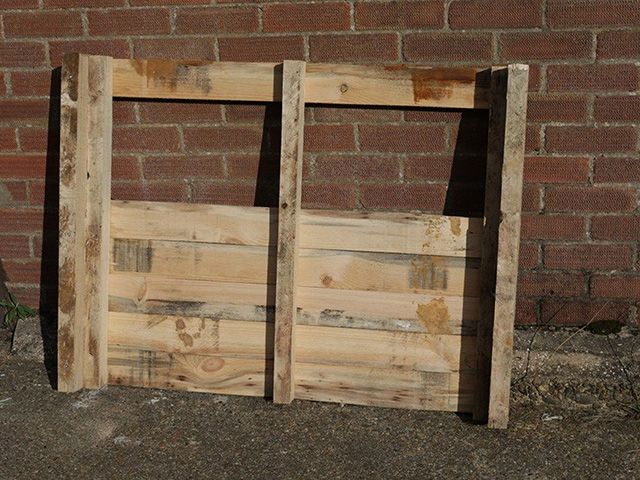
Image: ManoMano
3. Turn the back section of the bar over and attach 5 planks at the top of the bar. Again, position the planks close together. Using a piece of cardboard or paper stapled to the top of the front, mark out the BAR letters and decide where the lights will be. Using a drill bit slightly larger than fairy light bulbs, drill the holes through the cardboard and through the wood on the front of the bar.
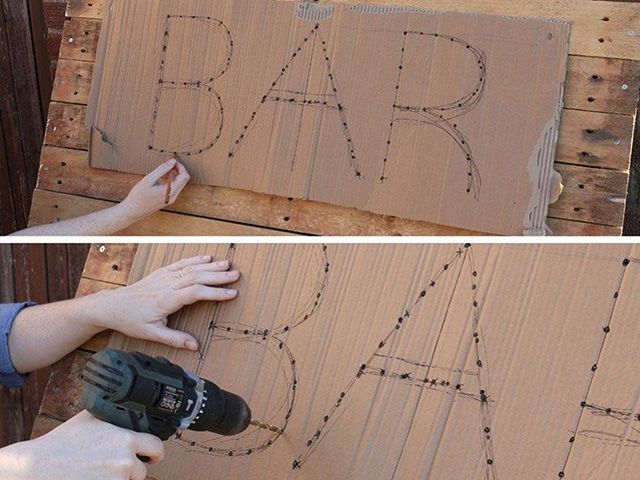
Image: ManoMano
4. Measure the distance from the base of the bar to the plank section at the top and cut down 2 side supports to fit this measurement. These will be the supports for the drop-down bar. Lay out the planks close together and add the side supports, positioning them set in from the ends of the planks. This will ensure that the drop-down panel will fit inside the corner supports of the bar.

Image; ManoMano
5. Cut away an angle from the bottom of the corner supports at the front of the bar. Place the drop-down section in position on the front of the bar and drill from the side through the corner support and the drop-down support. Add a coach bolt through the hole to act as the hinge. Repeat on the other side.
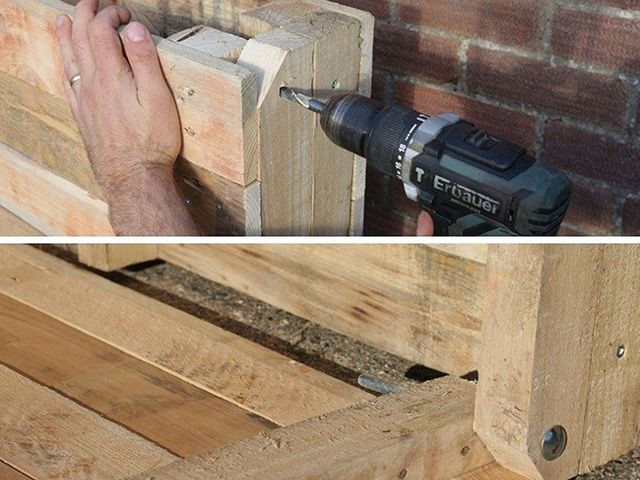
Image: ManoMano
6. Open the drop-down section and clad the top side with the planks. Use a tank cutter to cut holes along the back of the top layer. The holes need to be the size of your beer glasses, bottles or wine glasses, to allow them to sit inside the holes when the bar is finished. With the drop-down section closed, you’ll see a gap on the underside of the bar. Attach an extra support piece to fill the gap. This will create a ‘shelf’ behind the drop-down section when it is open.
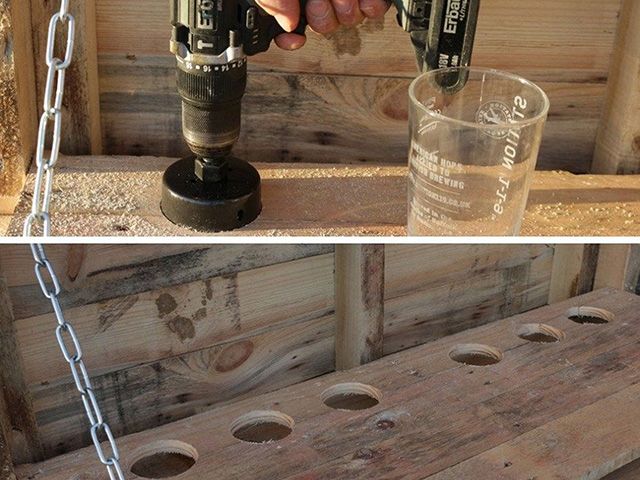
Image: ManoMano
7. Sand down all the rough edges and paint the back planks and the hole section on the drop-down with copper spray paint. Use chalkboard paint (either brush-on or spray paint) to paint the top, front and sides. This will allow you to use chalk to add the words ‘birthday’, ‘cocktail’ or any phrase you like to the top of the BAR sign.
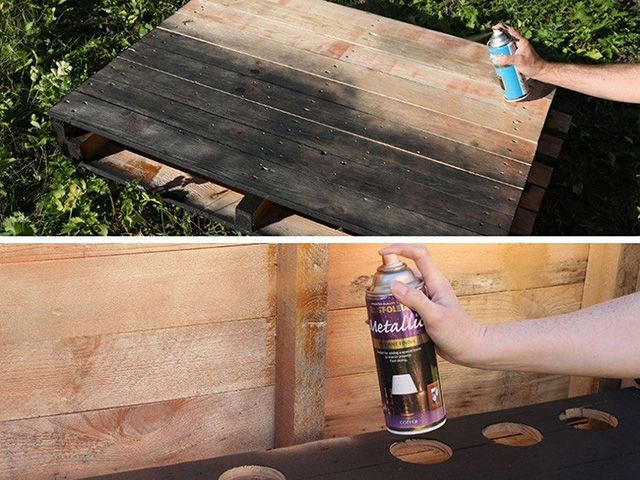
Image: ManoMano
9. When the paint is dry, use an eye hook and carabiner to attach a chain to the inside edge of the corner support. Add another eye hook and carabiner to the front of the drop-down section and clip on the chain. To close the bar, add 2 eye hooks on each side and close with 2 carabiners. Working from the back of the bar, poke the fairy lights through the holes. Turn the bar over and paint a fine line of metallic paint between each fairy light to spell out the word BAR.

Image: ManoMano
Are you going to try and make this pallet bar? Let us know on social! Tweet us @goodhomesmag or post a comment on our Facebook page.