


5 easy summer picnic recipes
Get ready for National Picnic Week and whip up these delicious recipes ready for your next summer outing.
Image: Watercress
Be prepared for National Picnic Week (22nd-28th June) and get creating some delicious family-friendly dishes. These snacks are perfect for any al fresco eating and any leftovers can be stored in the fridge or freezer for future summer picnics.
Terikyaki chicken sandwiches with slaw
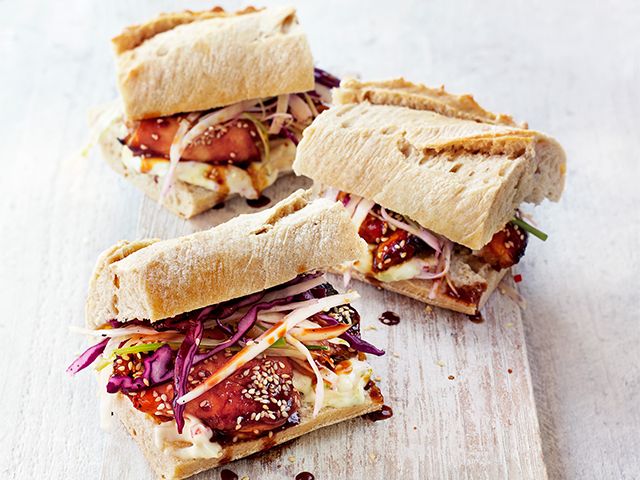
Image: Waitrose
Forget boring sandwich fillings – opt for something a little more special.
- Serves 4
Ingredients
- 6 chicken thigh fillets
- 6 tbsp Kikkoman Teriyaki Marinade & Sauce
- 100g red cabbage
- 100g white cabbage
- 4 salad onions
- 1 tbsp toasted sesame oil
- 2 tsp Japanese rice vinegar
- 4 tbsp sesame seeds, toasted
- 1 lime, zest
- 3 tbsp mayonnaise
- 1 red chilli, chopped (deseeded, if liked)
- 1 large baguette, cut into 4 pieces and split in half
Method
- Toss the chicken and 3 tbsp teriyaki marinade in a bowl; set aside while you prepare the slaw (or marinate for up to 2 hours in the fridge). Finely shred both cabbages and finely slice the salad onions. Toss in a bowl with the sesame oil and vinegar, then season and set aside.
- Preheat the grill to high (240°C). Grill the chicken with its marinade on a foil-lined baking tray for 5 minutes on each side, until there is no pink meat and the juices run clear. Tip any juices into a small pan, along with the remaining 3 tbsp teriyaki marinade, and simmer gently until sticky. Brush over the chicken, then sprinkle with the sesame seeds.
- Mix the lime zest, mayonnaise and chilli; season and spread on the baguette pieces. Halve the chicken thighs and divide between the bottom halves of the baguette. Pour over any remaining sauce from the pan, then add mounds of slaw and the bread tops.
Read more: 6 of the best picnic accessories for summer
Sausage plait
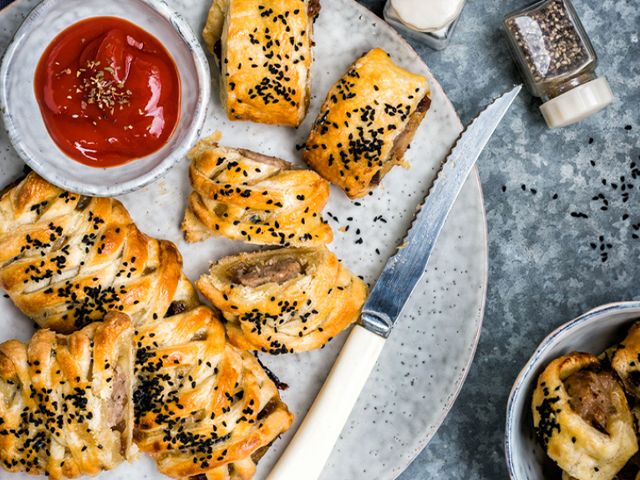
Image: AO Life
Sausage rolls are a picnic staple, but this twist on a classic particuarly delicious!
- Serves 6
Ingredients
For the pastry…
- 315g plain flour, more for dusting and rolling out
- 185g cold unsalted butter, cubed
- 45g cold vegetable shortening (such as Trex)
- 1 tbsp sugar
- 1 tsp salt
- 1 tbsp white or red wine vinegar
- 60ml ice-cold water (only use as much as needed)
For the filling…
- 6-8 good quality sausages
- 6-8 tbsp caramelised onion chutney (or you can experiment with other chutneys)
- 1 egg, lightly beaten for egg wash
- 2-3 tbsp nigella seeds or sesame seeds to sprinkle
- Mustard and ketchup to serve (optional)
Method
1. Put the flour, sugar and salt in the bowl of a food processor fitted with a metal blade. If you have time place in the freezer to chill for 10 minutes.
2. Add the cubed butter and shortening and pulse briefly until the mixture looks like breadcrumbs. Don’t overdo it though – you still need some pieces of butter the size of small peas.
3. Mix the water and vinegar and add it very gradually through the feeding tube while pulsing in short bursts until the dough forms clumps – you may not need to use all the water.
4. Place a large piece of clingfilm on your worktop and tip the dough on it. Pat the dough into a rectangle shape, wrap and chill for at least an hour or up to a day.
5. Dust your worktop with a little flour and roll the dough out to a long rectangle. Take one third of the pastry and fold towards the middle and fold the remaining third over the top to make three layers.
6. Repeat the rolling out and folding once more until the dough is elastic. Fold into thirds again, wrap in cling film and chill for another hour (or overnight) before using.
7. Preheat the oven to 220°C (200 Fan). Line two trays with baking paper.
8. Carefully remove the skin from the sausages and set aside. Cut the pastry in three pieces, keeping the pieces you are not using covered and in the fridge – especially if the day is hot! Roll the pastry out to a rectangle 15x30cm and roughly the thickness of a pound coin. Place a scant amount of the onion chutney in the centre of the pastry. Position two sausages over the chutney and cut the rectangle in half.
9. To create the sausage plaits, cut strips on the diagonal either side of the filling. Moisten the edges with a little egg wash. Fold the strips alternately towards the middle to create the plait. Lightly brush with egg wash and sprinkle with the nigella seeds. Place on baking tray and repeat with remaining pastry.
10. Reduce the oven temperature to 200C (180 Fan) and bake the plaits, in batches if necessary, for 25-30 minutes or until the pastry is golden. Serve with a little mustard and ketchup as dipping sauces if you like.
Classic mini quiches
Image: Watercress
A mini quiche is a total classic for any British summertime picnic.
- Serves 9
Ingredients
- 30g watercress, roughly chopped
- 6 eggs
- 3 large tortilla wraps (either plain or watercress flavoured)
- 5 cherry tomatoes, halved
- 2 slices honey roast ham
- Salt and pepper
Method
1. Pre-heat the oven to 180ᵒC. Take a 12cm round cookie cutter and cut out 9 circles from your tortilla wraps. Push the circles into the holes of a muffin tin.
2. Crack your eggs into a bowl and whisk them together along with a pinch of salt and pepper. Add in the chopped watercress and mix together.
3. Tip the egg mix into a jug and pour carefully into the tortilla cases, not quite filling to the top. Cut the ham slices into squares and place a square on top of each case, then top with half a cherry tomato. Place the quiches into the pre-heated oven for 10 minutes, or until egg is set and cooked through.
4. Remove from the oven and allow to cool for five minutes before removing from the tin. Serve warm with more watercress on the side.
Read more: 4 deliciously fruity dessert recipes for summer
Vegan maple and pecan scones
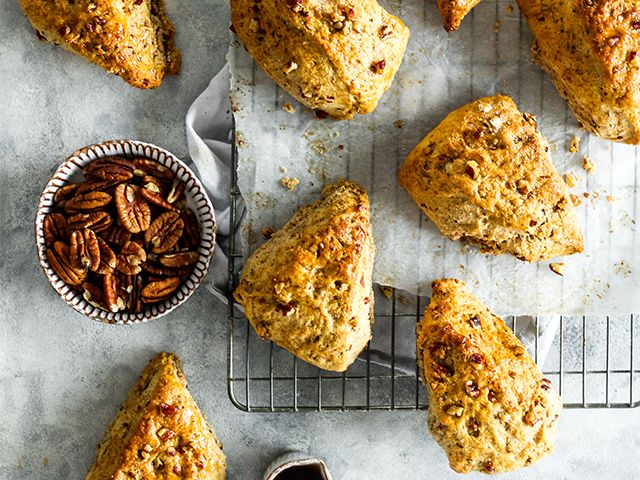
Image: What Luce Eats’ for Maple from Canada
Make these scones for a sweet treat to finish your picnic.
- Serves 8
Ingredients
- 135g dairy-free butter
- 50ml canned coconut milk
- 80ml dairy-free milk
- 50ml pure maple syrup (preferably amber syrup for its rich taste)
- 390g plain flour
- 2tsp baking powder
- 1tsp ground cinnamon
- 90g chopped pecans
- 30g maple sugar
- 1 flax egg (1 tbsp flaxseed plus 2 tbsp of water left to sit for 10 minutes
- Pinch of salt
Method
- Preheat the oven to 180°C. Scatter the chopped pecans on a baking tray. Toast in the oven for 10 minutes.
- Meanwhile in a large mixing bowl combine the flour, baking powder, cinnamon, salt and maple sugar. Add the butter and using your hands combine the mixture until it turns more crumb-like.
- In a separate mixing bowl combine the coconut milk, dairy free milk, maple syrup and the flax egg. Pour the wet mixture into the dry and mix until combined.
- Add the toasted chopped pecans and fold into the mixture. Next sprinkle some flour on the work surface and transfer the dough onto it. Knead until the toasted pecans are evenly scattered throughout the dough.
- Shape the dough into a circle and cut into 8 scones and transfer them to a lined baking tray. Sprinkle with some more maple sugar.
- Bake in the oven for 25-30 mins. Allow to cool slightly before glazing with more maple syrup and enjoying.
Peanut butter cherry cups
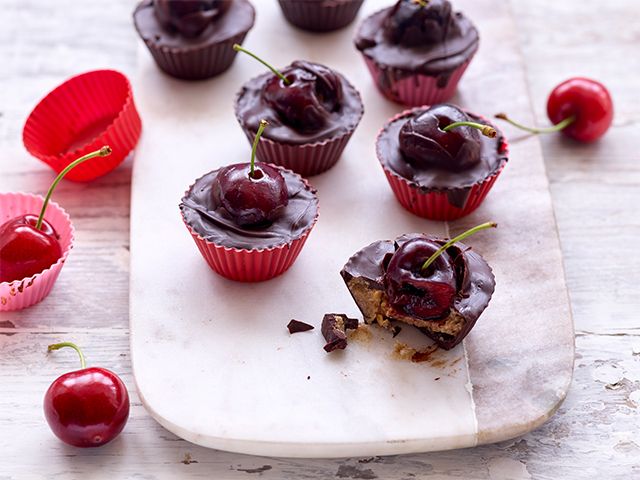
Image: Love Fresh Cherries
Not only do these peanut butter cups look as pretty as a picture but are great to make with the kids and are super-tasty too!
- Serves 10
Ingredients
- 100g dark chocolate, broken into pieces
- 50g Peanut butter
- 1 tsp honey
- Pinch of sea salt
- 10 fresh cherries, pitted
- You will also need 10 mini paper or silicone cases
Method
1. Arrange the paper or silicone cases on a tray. Melt the chocolate in the microwave or over a pan of gently simmering water. Using around two thirds of the chocolate spoon a little into the cases and brush up the sides, then chill in the fridge for 10 minutes until set.
2. Combine the peanut butter with the honey and stir. Spoon the mixture into the chocolate cases to just below the rim. Top with a cherry pushing it down into the mixture slightly.
3. Then spoon over the remaining melted chocolate enclosing the mixture completely. Chill until set. They can remain in the fridge, covered for 3-4 days or you can freeze them defrosting for 5-10 minutes before eating.
Are you going to make any of these delicious recipes? Let us know on social! Tweet us @goodhomesmag or post a comment on our Facebook page.