


How to lay patterned floor tiles
Patterned tiles are a popular choice for kitchen flooring. Take a look at this step-by-step guide on how to successfully lay them.
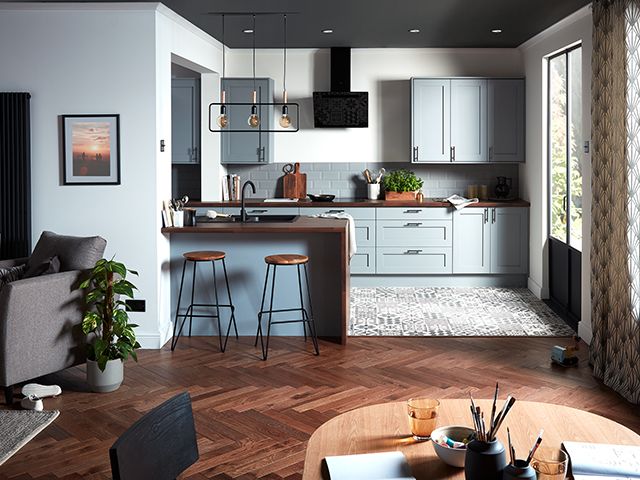
Image: B&Q
Mixing flooring types is one of the most popular trends this year, and adding pattern to an area in your kitchen can help to add character and separate a large space. We spoke to Laura Dollimore from B&Q, who has shared a step-by-step guide to make the process hassle free.
1. Prep and plan
First things first, planning! Start by deciding how much of your space you want to tile. Just as if you were tiling the entire room, you’ll want to start from a central point and work your way out to each corner. The space you want to tile also needs to be even, flat, dry and free from damp.
2. Find the centre point
Next, find the central point of the area you’ll be tiling. To do this, measure one wall, calculate its mid-point and mark on the floor. Then repeat with the rest of the walls. Next, find yourself a helper and draw a line between the two points.
Then create two marks on the line, each one metre from the mid-point, tie one metre of string to a pencil. Hold the end of the string on the first of the two marks and draw two sets of arches at a 45° on the floor. Repeat on the other side. If you draw a straight line between the centre of these two arcs, you’ll have a perfect 90° angle in the centre of your space!
3. Spread adhesive
Starting at the position you’ve just marked out, use a gauging trowel to place tile adhesive on the floor, and then a notched trowel to spread this across an area of approximately 1m².
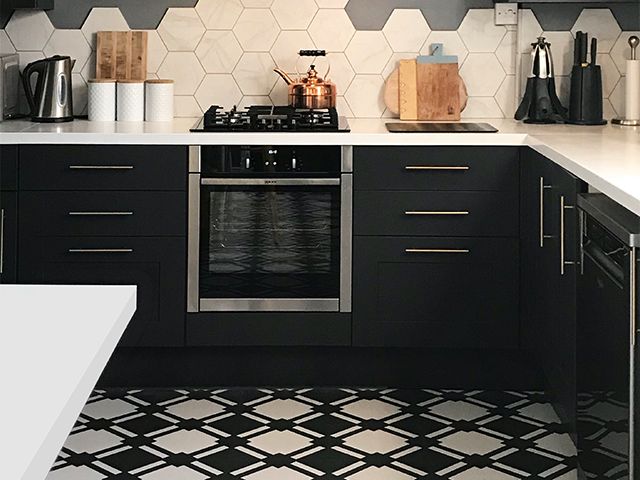
Image: Harvey Maria
4. Start laying
Now it’s time to start laying your tiles. Place your first tile firmly into the adhesive against your 90° degree line using a twisting action to bed into the adhesive. Repeat this process with the next tile, placing tile spacers between each one to ensure they’re evenly spaced.
Repeat this process until you’ve finished laying all the tiles. Occasionally, check the tiles are flat with a spirit level. Don’t worry if they’re not – just grab a rubber mallet and tap them lightly to level them.
5. Time to grout
Once the adhesive has set, you can start grouting. First, remove any dust or debris from the surface, and check that no tile spacers are sticking up. Then use the gauging trowel to remove the grout from the tub, then work into the tile joints using a grout float until the grout is level with the surface of the tile, covering all of the spacers.
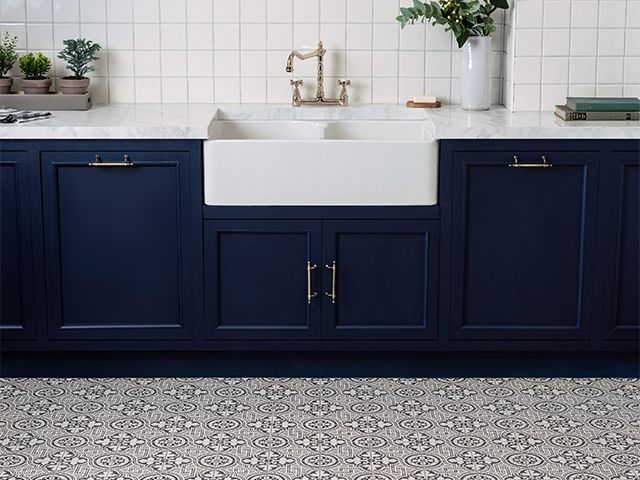
Image: Original Style
6. Clean finish
Finally, seal around the edges of your space with a flexible sealant that matches the grout. This will help accommodate any movement or expansion between the wall and the floor. Work from one end of the skirting to the other and apply a continuous bead of sealant, keeping a steady pressure and speed.