


How to create barista standard coffee at home
Want the secret to a coffee-shop quality latte at home? We get the lowdown from the experts.
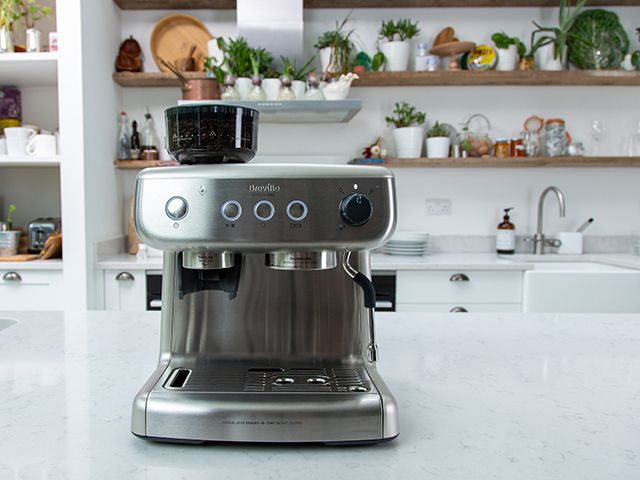
Image: Breville
With working from home set to remain the ‘new normal’ for many people, you might find yourself craving your commute-quality cup of coffee.
We spoke to Breville’s Resident Barista, Chloe Taylor, to get some insider insight.
Select the right beans
https://www.instagram.com/p/CCY4KHjFqG6/
It’s all about the bean selection. Whether you’re buying them from the supermarket or an independent roaster, check the roasting date first. Beans should be left for seven days after roasting to ensure they have the right level of oxidation for the oils to be released. It’s these oils which create the crema and provide that coffee shop flavour. Before rotating beans in your machine, run a small amount of new beans through the grinder to avoid cross contamination with fresh vs. old beans, as this can affect the balance of flavour.
Storing beans
Light can have negative effects on your beans so it’s important to store them in a dry, dark environment. Never store them in the fridge (even in an airtight container) as this can lead to contamination with other flavours and smells. Moreover, avoid storing beans in airtight containers as removing oxygen from the beans ages them and sucks out the oils.
To keep beans fresher for longer, store them in the bag they came in as these bags feature a valve which controls the amount of air the beans are exposed to. Make sure you use your beans within 30 days; after which they continue to oxidise further, and the flavour can become bitter. This doesn’t mean your beans cannot be used, it simply means that are no longer at their peak.
Heating your mug
https://www.instagram.com/p/CCobsUXJ01O/
To keep coffee hotter for longer, use the steam wand to heat an empty cup. If your machine doesn’t have this function, warm your cup using boiling water from the kettle, or better still, invest in Breville’s brand new Barista Max or Mini.
Buy the Barista Max Coffee Machine from Breville
Tamping
Once you’ve ground your beans, add a heaped mound to your café portafilter. Now you’re ready to tamp. When tamping, don’t worry too much about the amount of pressure you’re putting on the coffee – using just a light amount is sufficient. The most important thing is to make sure the tamper is level on the coffee’s surface so that when the grounds come into contact with water, the water can penetrate the coffee evenly.
Dairy vs. plant-based milk
https://www.instagram.com/p/CCbc50DF6Qk/
If you’re looking for a good foam or froth, make sure you’re using the right milk. It’s easier to stretch the milk proteins by using one with a higher fat and protein content (such as whole milk). Plant-based milks are harder to work with as they contain less fat and proteins, but practice is key. Barista plant-based milks are becoming more readily available and achieve better results. Regardless of your preference, always use milk straight from the fridge as the proteins stretch more easily at this temperature.
Extraction
When it comes to extraction, it’s all about finding the perfect balance and getting the perfect pour. If the extraction is too fast, this can result in an acidic tasting coffee, as the extraction has not had enough time to draw oils and flavours from the beans. In terms of pour, you want to make sure the coffee runs through the machine slowly to ensure the oils are transferred into your cup. Baristas often refer to this ‘perfect pour’ as resembling a ‘rat’s tail’. When creating longer drinks, avoid free pouring, as this means the machine will overextract the ground beans and your coffee will taste bitter. Instead, add hot water to your mug before you add the coffee. Then, hold the cup at an angle and extract the coffee directly on top of the hot water to create the crema.
Frothing your milk
https://www.instagram.com/p/CEexcYgJKBf/
If your machine comes with a milk wand, there are some hacks to ensure you’re creating perfect microfoam every time. Ensure you purge the steam wand before you put it into your milk as this ensures there is no water in the wand which could contaminate the milk. It also helps clear the wand prior to use. To help get the perfect coffee to milk ratio, use the bottom of the spout on your milk jug as a rough guide.
To create the perfect microfoam for latte/flat white, ensure the end of the steam wand is always on the surface of the milk and the milk is swirling over the top of the bulge of the wand. By doing so, you’ll create a microfoam, however if the wand is higher than the surface it makes the foam more aerated. When your milk is almost ready, plunge the wand fully into the jug and turn the wand off and tap the jug on your work surface. This prevents larger bubbles forming and ruining the smooth microfoam you’ve created. The milk is ready when you can’t keep your hand on the jug for more than 3 seconds and resembles glossy emulsion paint. Finally, always remember to purge and wipe down the wand straight away. This makes for easier cleaning and prevents it blockages.